Blog

Preserving Meat in the Field: Bushcraft Smoking and Drying Techniques

Disclaimer: Always check local laws and health guidelines before consuming meat preserved in the field. These methods are traditional and may not meet modern food safety standards. Use at your own risk.

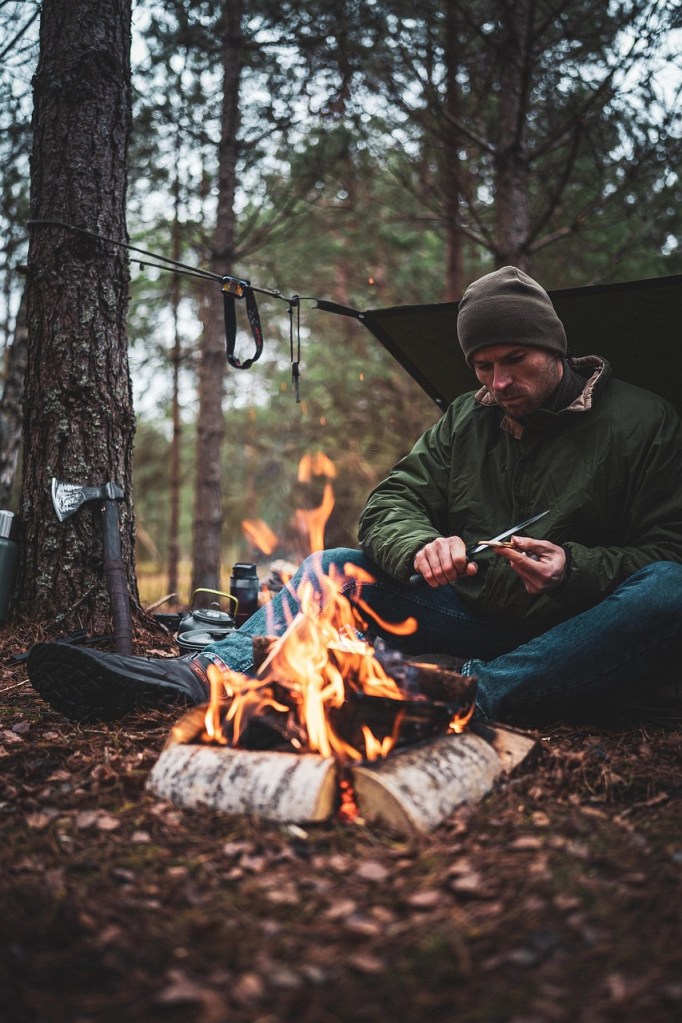
When you’re out in the woods without refrigeration, meat starts to spoil quickly. If you harvest more than you can eat right away, knowing how to preserve it can make the difference between a successful trip and wasted food. Smoking and drying meat are some of the oldest ways people have kept meat edible without cold storage. With a little preparation, you can do it right in the field.

Set Up Your Rack Before You Need It

If you’re planning to hunt or trap and stay out for a while, it’s best to build your smoking or drying rack before you have meat on the ground. That way, once the animal is cleaned and prepped, you can get it hanging immediately instead of leaving it to sit while you scramble to make something.

To build a simple rack, find four forked sticks about shoulder height and plant them firmly in the ground in a square. Use sturdy crossbars to span the forks. Lay green wood across the top to hold the meat, or use cordage to suspend it. Make sure it’s stable and allows good airflow. It’s a good idea to make a small teepee structure around the frame that has green foliage to keep the smoke in but not so tight as to reduce the majority of airflow.

Clean and Prep the Meat Right Away

As soon as the animal is down, gut it and wipe out the cavity. Skin it quickly and hang the quarters to help it cool off. If it’s a smaller animal, you can leave it whole and just split it down the middle.

Cut the meat into strips about a quarter to half an inch thick. Try to keep them uniform so they dry at the same rate. Trim off fat whenever possible since it tends to go bad faster than muscle. The leaner the meat, the better it preserves.

Decide Whether to Smoke or Dry the Meat

The weather will usually help you decide. Drying works well when it’s warm, dry, and breezy. Hang the meat in a shady spot where the air can move freely.

Smoking is better when the air is damp, cool, or filled with insects. Smoke protects the meat and slows bacteria while helping to dry it out. It also adds flavor, which can be a nice bonus when you’re living rough.

Build a Low Fire for Smoking

If you’re going to smoke the meat, use hardwood if it’s available. Oak, hickory, maple, and fruitwoods are good choices. Avoid pine, cedar, or other resinous woods since they leave behind bitter and potentially harmful residue.

Start a small fire and let it burn down to coals. Add green wood or wet material to create steady smoke. Keep the heat low. You don’t want to cook the meat. It should feel warm to the hand but not hot enough to sear.

Let It Smoke or Dry Fully

Drying can take anywhere from eight hours to a couple of days depending on the weather and the thickness of the strips. Smoking usually takes a full day or more. Some people let it go longer to get a firmer texture.

The meat should be dark, leathery, and dry to the touch. It should bend and tear rather than snap or feel sticky. If it still feels soft or moist on the inside, it needs more time.

Store It the Right Way

Once the meat is done, wrap it in cloth or place it in a basket or bark container that allows air to pass through. Keep it in the shade and away from animals. Avoid plastic or airtight containers since they can trap moisture and cause mold.

Check for Spoilage

Trust your nose and your hands. If the meat smells sour or feels slimy, it’s not safe to eat. A little white surface mold can sometimes form, but if it spreads or changes color, throw the meat out. Out in the field, it’s always better to be cautious.

Final Thoughts

This kind of meat preservation takes practice, and it depends a lot on the conditions around you. It is not as precise as refrigeration, but it can keep you fed and help you make the most of what you harvest. These skills were once common knowledge. Bringing them back into your toolkit is a good step toward being more self-reliant in the wild.

Carving a Try Stick: Why It’s One of the Best Skills to Practice

Disclaimer: This post is for informational purposes only. Always use knives and carving tools responsibly. Practice in a safe environment, especially if you’re new to bushcraft. Supervised instruction is always a good idea when working with blades.

Carving a try stick is one of the first things you should do if you want to get better at bushcraft. It’s simple, doesn’t take much time, and teaches a lot more than it seems at first.

A try stick is just a practice stick. You take a branch about the length of your forearm and carve or baton notches into it. These notches are the same ones you’d use to make a fire pit hook, trap, shelter joint, or cooking rig. Each one helps you learn how to control your knife, how wood behaves under the blade, and what kind of cuts work best.

Start with a square notch. It’s useful when you need two pieces of wood to fit together without sliding. Then try a pot hook notch, which can hold a kettle over a fire. A V-notch is good for holding cordage. You might also shape a pointed end like a stake or carve a peg that can hold a guyline. You don’t need to carve every kind in one stick, but trying a few different ones will give you a feel for the work.

You’ll figure out how to stop a cut before it splits the wood, how to slice without tearing fibers, and how to control the depth and angle of each stroke. Over time, that kind of control becomes second nature, which makes your other bushcraft work faster and cleaner.

Use any decent knife and a stick from around the yard. Dry wood works well because it won’t gum up your blade, but green wood is easier to shape if you’re just starting out. Sit somewhere quiet, maybe near a fire pit or in the garage, and take your time. There’s no rush and no wrong way to learn. If the notch doesn’t come out clean, just try again. The next stick is free.

Practicing at home like this is safer than heading into the woods with a knife you’ve barely used. There’s less pressure and you can repeat things without the stress of cold weather or bad light. It’s also a good way to build hand strength and learn how different woods respond. Cedar cuts like butter but splits easy. Oak is tough and takes more effort. Each species teaches something different.

If you want to get into bushcraft, this is where to start. You don’t need a course or a guide. You need a stick, a knife, and a quiet place to practice. The try stick doesn’t look like much when it’s done, but it holds hours of learning in every cut.

Rendering Tallow: A Simple Homestead Skill with Big Payoff

Disclaimer: This blog post is for informational purposes only. Always follow proper food safety procedures and consult a trusted resource or local extension office when learning new food preservation methods.

Tallow is one of those nearly forgotten old-time staples that’s making a quiet comeback among homesteaders and outdoorsfolk. It’s simply rendered beef fat, slow-cooked down into a clean, shelf-stable fat that you can use for all sorts of things—from cooking to soap making to waterproofing gear.

What Is Tallow?

Tallow comes from suet, the hard fat found around a cow’s kidneys. You can also use regular beef fat trimmings if that’s what you have. When slowly melted down, strained, and cooled, it becomes a creamy, off-white solid that stores well and has a long shelf life.

Why Make It?

It’s versatile, long-lasting, and a great way to use up scraps that might otherwise go to waste. Tallow is high in saturated fat, which gives it excellent stability at room temperature. That makes it a useful fat for high-heat cooking and for making homemade goods that need to resist spoilage.

It’s also a step toward self-reliance. If you’re butchering animals at home or buying in bulk, you can turn fat into a resource rather than a byproduct.

How to Render Tallow

You don’t need fancy equipment. A crockpot works great.

Chop the fat into small pieces. Trim off as much meat and gristle as you can. Put it in a slow cooker on low, with the lid off to let moisture escape. Stir occasionally and cook for several hours until the fat is melted and the remaining bits (called cracklings) are browned. Strain through cheesecloth or a fine mesh strainer into a clean mason jar. Let it cool. It will go from golden liquid to white solid.

That’s it.

Storing Your Tallow

Once rendered and strained, tallow doesn’t need refrigeration—though it’ll last even longer if you do refrigerate it. At room temperature in a sealed jar, it’ll keep for about 3 months. Keep it in a dark, cool pantry, and always use clean utensils to scoop some out.

What You Can Use It For

Cooking: Great for frying, sautéing, or seasoning cast iron. It has a high smoke point and a mild flavor.

Soap making: Old-school lye soap often used tallow as a base.

Candles: Burns clean and steady, though not as fragrant as modern wax blends.

Leather care: Rub it into boots or belts to condition and waterproof.

Metal tools: Helps prevent rust.

Skin balms: Combine with beeswax and essential oils for a simple, nourishing salve.

Final Thoughts

Tallow isn’t just for the diehard traditionalist. It’s a practical, no-nonsense skill that turns scraps into something valuable. It keeps well, has dozens of uses, and fits right into a homestead lifestyle—especially if you like to use everything and waste nothing.

Got some beef fat? Don’t toss it. Render it. Don’t have it? Ask your local butcher.

How to Make a Simple Bushcraft Camp Without Power Tools

Disclaimer:
The information provided in this blog post is for general informational purposes only. It is not intended as professional advice and should not be relied upon as such. Always consult with qualified professionals and local authorities before engaging in any outdoor, survival, or homesteading activity. Use caution and exercise personal responsibility when working with tools, fire, wild foods, or unfamiliar environments. The author and publisher assume no responsibility or liability for any injuries, damages, or losses that may result from the use or misuse of the information provided here. Participation in outdoor activities is done at your own risk.

Building a small bushcraft camp doesn’t need to be complicated or expensive. You don’t need to pack in a pile of gear or haul a generator out into the woods. If you’ve got a sturdy knife, a hatchet, and some patience, you’ve already got what you need to get started.

The goal here isn’t to build something fancy. It’s to set up a basic shelter and work area that gives you cover from the weather and a spot to rest, cook, or get yourself together. Done right, it teaches you a lot about the land, your tools, and your own limitations.

Start with location. Look for a spot with natural windbreaks, some tree cover, and dry ground. Avoid low areas that collect water when it rains. Pick a place near a good supply of downed limbs and deadwood so you don’t waste your energy dragging logs from half a mile away. If camping under trees, always search the area for widowmakers. These are dead or unstable branches that can fall without warning, especially in wind or under the weight of snow. They’re dangerous because they can cause serious injury or death if they fall on someone, hence the grim nickname.

Your first shelter doesn’t need to be more than a simple lean-to. Use a ridgepole balanced between two forked sticks, or lash it to two trees if you have the material to do so. Stack smaller limbs against one side at an angle, then layer it with leaves, bark, or pine or cedar boughs to help block wind and rain. You can make a raised bed out of logs and cover it with grass or pine needles to keep off the cold ground. Remember, a ruffage bed should be as thick as your arm is long to keep your body heat from leaving into the ground too quickly.

For a fire area, clear a space down to bare dirt. Circle it with stones if you have them. Use a small tripod made from branches to hang a pot, or lay some stones in or around where the fire will be to rest a pan. It’s not fancy, but it works.

Keep the tools simple. A strong fixed-blade knife and a hatchet are enough to cut, split, shape, and notch what you need. If you know how to tie a few strong knots (start with bowline, it’s easy and super useful) and use some cordage wisely, you can do a lot more than folks think. The more you work without modern tools, the more you figure out how to make what you have do double duty.

The real value of building this kind of camp isn’t just having a place to sit. It’s the practice. You start to understand how wood behaves, how weather hits a certain slope, and how fire reacts to wet air or dry sticks. You learn how to make do and how to keep things simple. That’s the kind of skill that sticks with you.

Don’t feel like you have to disappear for a week to try this. Start in the backyard. Try setting up a lean-to and a small fire ring if your local ordinances allow. Spend an evening out there. You’ll see what works and what doesn’t, and you won’t be far from dry clothes or clean water if something goes sideways.

The more you do this, the less gear you find yourself packing. You begin to understand the value of a good stick, a dry patch of ground, and a sharp edge. That’s what bushcraft is really about; working with the land, not against it.

Chasing Catfish in Northeast Kansas

Disclaimer: This blog post is for general information only. Always check Kansas fishing regulations and make sure you have the proper license and permission before fishing. Conditions change, and laws can vary from one spot to another.

When the weather turns warm and the air feels heavy, catfish come alive in the waters around Northeast Kansas. You don’t need a boat or a guide. A rod, some bait, and a quiet evening by the water are enough to get started.

The catfish around here are reliable. They show up in rivers, spillways, ponds, and the coves of larger lakes. Clinton Lake, Perry Lake, and Melvern are well-known spots, but plenty of smaller creeks and access points hold good fish if you’re willing to look. Backwaters, bridge crossings, and public fishing areas are worth walking. The less disturbed the water, the more likely something’s waiting down there.

Evenings tend to be the best time to fish, especially in the summer. The sun dips low, the bugs come out, and the catfish start to roam. Cut shad, chicken liver, and dip bait all work well. You’ll hear arguments over which is best, but what matters most is putting it where the fish are.

Flatheads are a different story. They prefer live bait and deeper water with structure like fallen trees, rock piles, or anything that gives them a place to ambush. They don’t bite as often, but when they do, it’s something to remember. They also get big, so make sure your gear can handle it.

Some folks around here go hand fishing, or noodling. It’s legal in Kansas during specific times for flathead, but it’s not something to do alone or without learning from someone who knows what they’re doing. It’s serious work and not without risk. I’ve heard tale of more than a few noodling accidents.

If you haven’t been fishing in a while, now’s the time. The nights are getting warmer, the fish are starting to move, and there’s always room on the bank for one more line in the water.

The Difference Between Bushcraft and Survival (and Why It Matters)

Disclaimer: Always train with proper instruction. Field conditions can change fast, and gear alone won’t save you. Learn your limits, test your gear, and never stop practicing.

A lot of people lump “bushcraft” and “survival” into the same bucket. And while they overlap, they’re not the same thing. If you don’t know the difference, you could be training the wrong way for the wrong reasons — or packing the wrong gear when it matters most.

Let’s break it down.

Survival: Urgency, Efficiency, Getting Out Alive

Survival is about staying alive when things go wrong. It’s urgent, uncomfortable, and usually short-term. You’re wet, cold, tired, hungry — and trying to make it back home or stay alive long enough for help to reach you.

Skills like:

Building a fire fast, even in the rain Finding and purifying water Making a temporary shelter with whatever’s on hand First aid with minimal gear Staying calm and making smart decisions when it’s hard to think

Survival isn’t about making things look good. It’s about doing what works, now — even if it’s ugly. You’re burning calories and time, and the clock is always ticking.

Bushcraft: Patience, Craft, Living with the Land

Bushcraft is different. It’s not about getting out of the woods — it’s about learning to live in them. You’re not in crisis. You’re working with the land, taking your time, and using natural materials to create long-term solutions.

Bushcraft involves:

Carving tools, stakes, and traps Cooking over a fire you built with your own bow drill Crafting shelters from natural materials Identifying plants and trees by use Making cordage from roots, bark, or sinew

Where survival is about speed and efficiency, bushcraft is about technique, resourcefulness, and comfort over time.

Why the Difference Matters

If you’re trying to survive a winter night in the woods with no gear, this is not the time to practice carving spoons or building a debris hut from scratch. And if you want to truly understand your environment, packing freeze-dried meals and a GPS will only take you so far.

Both are valuable. But they serve different goals. If your focus is emergency readiness, you should train for survival — fast fires, quick shelters, lightweight gear, solid fitness, clear priorities. If your interest leans toward skill-building and a deeper connection with nature, lean into bushcraft — but don’t confuse it for a survival plan.

Final Thought: Master Both, but Know Which One You’re Practicing

The best practitioners train for both. You build your survival mindset to respond under pressure. You sharpen your bushcraft skills to understand the land and use less gear. Just make sure you know which one you’re doing — and don’t count on slow skills to save you in a fast-moving emergency.

Common Gear You Should Ditch from Your Pack Right Now

Disclaimer: This post is not a substitute for formal training. Seek professional training and advice before doing any survival activities.

Overpacking is one of the fastest ways to sabotage yourself in the field. It wears you out, slows you down, and makes it more likely you’ll leave your gear behind when you actually need it.

Here are a few items worth reconsidering, especially if your pack’s starting to feel like a burden.

1. The Rambo Knife

Big knives are cool until you have to carry one for 10 miles. Most tasks knives are used for such as whittling, food prep, fire starting, and batoning are better handled by a smaller, well-made fixed blade. Unless you’re doing serious backwoods shelter work, ditch the massive steel and carry something manageable. We prefer something in the 4.5” to 6” range.

2. Too Many Ways to Cook Food

You’re not setting up a full-service camp kitchen. If you’ve got a folding stove, a grill rack, and a hanging pot tripod all stuffed in the same pack, it’s time to scale back. Choose one method that works reliably and learn it inside and out. A single pot, a small pan, and one heat source is plenty for most field needs.

3. Redundant Fire Starters

Fire matters. But if you’re hauling four different fire-starting methods and haven’t mastered one, it’s wasted space. Two is enough: one fast and easy (like a lighter) and one durable backup (like a ferro rod). Then focus on tinder prep. Even the best tools won’t help you if you don’t know how to build a proper fire lay or choose dry material.

4. Heavy Flashlights

Big flashlights drain batteries fast, take up space, and keep your hands full. A lightweight headlamp is better in almost every situation. Just make sure you carry extra batteries and store them properly.

5. Tactical Toys

This includes multitools shaped like skulls, “survival” credit cards, belt-buckle knives, or anything you packed because it sounded useful on a forum. Ask yourself: Have I used this in the last three trips? Would I trust my safety to it? If the answer’s no, pull it.

Take Skills Instead

Skills don’t weigh anything. They don’t rust, run out of batteries, or fall out of your pack. The more you practice, the less you rely on gear — and the more options you have when something fails.

A person who knows how to make fire with one lighter, cook with a single pot, and navigate with a map will go farther, faster, and safer than someone carrying every gadget known to man but no idea how to use them.

Your pack should be a reflection of what you know, not what you saw on a checklist. Every piece of gear you carry should serve a real purpose you’ve practiced. Knowing how to use something is more important than simply owning it.

Raising Hogs on a Homestead: Understanding the Four Types of Hogs

Raising hogs on your homestead can be a rewarding experience, offering a source of meat, manure for your garden, and even companionship. Understanding the different types of hogs you might encounter is crucial to successfully managing your herd. There are four primary types of hogs: gilt, sow, barrow, and boar. Each serves a different role on the homestead, and knowing the differences can help you make informed decisions.

1. Gilt

A gilt is a young female pig that has not yet given birth. Typically, gilts are raised with the intention of becoming breeding females once they reach maturity. They are generally less aggressive than boars and are a good choice for homesteaders interested in breeding their own pigs. When selecting a gilt for breeding, it’s important to ensure she has good genetics for desirable traits like size, temperament, and health.

2. Sow

A sow is an adult female pig that has given birth at least once. Sows are the cornerstone of any breeding operation. They are usually selected for their ability to produce healthy litters of piglets. Once a sow has finished her breeding cycle, she can be kept on the homestead for future reproduction. It’s essential to manage sows carefully to ensure they remain healthy and productive, as they require proper care during pregnancy and after birth to maintain their health and produce healthy piglets.

3. Barrow

A barrow is a castrated male pig. Castrating male pigs, especially those raised for meat production, helps prevent unwanted behaviors such as aggression and roaming. Barrows are generally easier to handle than boars and are preferred for meat production. Their meat is also less likely to have the strong taste that some intact males (boars) develop. Barrows are a good choice for homesteaders interested in raising pigs for pork without the complications of managing breeding males.

4. Boar

A boar is an intact male pig, typically used for breeding. While boars can be valuable for their genetics, they can also be more aggressive and harder to manage than other types of hogs. Boars should be kept in a secure enclosure to prevent injury to other pigs, and they require special care and attention to ensure they remain healthy and effective breeders. If you don’t plan to breed pigs on your homestead, keeping a boar might not be necessary.

Raising Hogs on Your Homestead

When deciding which type of hog to raise, consider the purpose of your operation. If you are interested in breeding, you’ll need at least one sow or gilt and a boar. For meat production, barrows are typically the best option. Always keep in mind the space, resources, and care each type of hog requires.

Additionally, if you are new to raising pigs, it’s important to consult with local regulations and experts to ensure you are managing your hogs in the most humane and sustainable way possible. For specific advice, consider seeking professional guidance or pressing local agricultural extension offices to ensure compliance with local laws and best practices.

Raising hogs can be an excellent addition to your homestead if done properly. By understanding the roles of gilts, sows, barrows, and boars, you can make the best choice for your operation, whether you’re raising pigs for breeding, pork production, or both.

Growing Your Own Vegetable Garden: A Simple Guide

Disclaimer:

This article is meant for general information only. Every garden is different depending on your location, soil, and climate. Talk to a local gardening expert if you want advice for your specific area.

There is something special about walking outside and picking fresh vegetables you grew yourself. You do not need a huge yard or years of experience to start a garden. A little patience and a willingness to learn go a long way.

Here are some simple tips to help you get started:

1. Choose a Good Spot

Vegetables need plenty of sunlight. Try to find a place that gets six to eight hours of sun each day. You also want to be close to a water source. Stay away from places where water tends to collect after it rains.

2. Start Small

It is easy to get excited and want to plant everything at once. Beginning with a small garden will give you a better chance of success. Pick a few vegetables you like to eat and focus on growing those first.

3. Prepare the Soil

Good soil is key. Loosen it with a shovel or garden fork and mix in compost or aged manure if you can. The soil should feel loose and rich when you run it through your hands.

4. Pick Easy Vegetables

Some plants are easier for beginners. Good choices include: Lettuce, radishes, green beans, zucchini, and tomatoes.

These grow fairly quickly and do not need a lot of extra care.

5. Water the Right Way

Plants usually need about an inch of water each week. It is better to water deeply once or twice a week than to sprinkle a little every day. Deep watering encourages stronger roots.

6. Keep Weeds Under Control

Weeds steal nutrients and water from your vegetables. Pull them by hand when they are small. You can also put down straw or leaves around your plants to keep weeds from growing and to help the soil stay moist.

7. Watch for Pests

Look at your plants often to catch problems early. Sometimes picking off bugs by hand is enough. Other times you might want to use natural methods like spraying a little soapy water on the leaves or planting flowers nearby that attract good bugs.

8. Use a Planning Tool

Planning your garden can feel overwhelming at first, especially if you are not sure when to plant each vegetable. I recommend trying the Seedtime app. It helps you plan out your season based on your local frost dates. It shows you when to start seeds, when to transplant, and when to harvest. I am not affiliated with Seedtime, I just find it helpful and easy to use.

Starting a garden is a journey. Some things will go right, some things will not. Every season teaches you something new. Keep learning and enjoy the process. Before long, you will have a yard full of food you can be proud of.

Ethical Turkey Hunting

Disclaimer: Always practice with your gear before hunting and seek professional instruction if you are unfamiliar with safe shooting techniques. Follow all Kansas hunting regulations and ethical guidelines. Safe, responsible hunting protects the future of the sport for everyone.

In spring turkey hunting, patience, judgment, and discipline matter just as much as a good aim. Ethical hunting starts with knowing your effective range and being willing to pass on shots that aren’t a sure thing. Turkeys have a very small vital area; the head and neck. There’s little room for error. A poor shot can wound the bird, causing it to suffer or escape, something no hunter wants on their conscience.

Before heading into the field, spend time with your gun. Pattern your shotgun with the exact load you plan to hunt with. Shoot from multiple distances—20, 30, 40, even 50 yards—and see where your pattern starts to fall apart. A good rule of thumb is to only take shots where your pattern will land a solid group of pellets solidly in the vital area. For most setups, that effective range falls somewhere between 30 and 40 yards, but it depends heavily on your gun, choke, and ammunition.

Don’t let the excitement of the hunt push you beyond your limits. It’s better to let a bird walk away clean than to risk a bad hit. Ethical hunters show respect for the land, the traditions of hunting, their fellow hunters, and their game.

Knowing your gear, practicing regularly, and making responsible decisions in the moment are good habits. They’re part of the responsibility that comes with carrying a weapon into the woods.