Urban Homesteading

Disclaimer: Always check your local ordinances, zoning laws, and HOA regulations before starting any homesteading activities. What’s allowed can vary widely between towns, neighborhoods, and counties. Additionally, some skills and practices—such as food preservation, tool use, or rainwater collection—require proper training to be done safely and legally. Take the time to learn from qualified sources, attend workshops when possible, and seek guidance from experienced practitioners. Safety and compliance are just as important as self-reliance.

Living in town doesn’t mean you have to give up on the homesteading dream, just shift your focus. If your local ordinances don’t allow chickens, goats, or other traditional livestock, there are still plenty of ways to build resilience, reduce dependency, and reconnect with your food and environment.
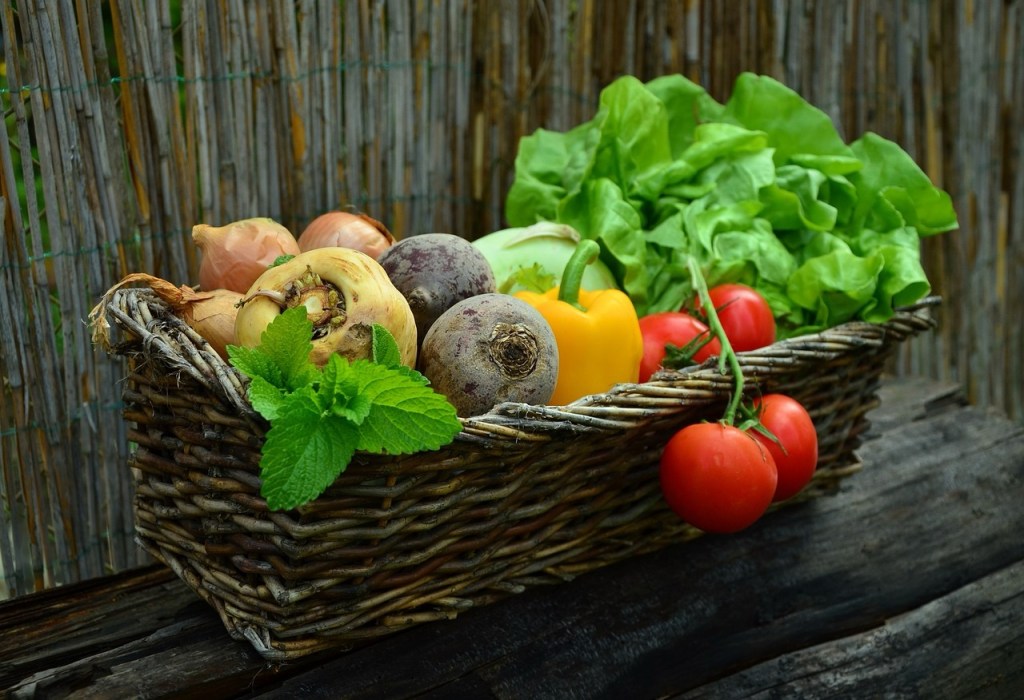
Start with the soil

Even a small yard or patio can become productive. Focus on container gardening, raised beds, or vertical setups along fences or walls. Grow high-yield crops like tomatoes, peppers, lettuce, and herbs. Root vegetables and leafy greens also do well in limited space and can grow in deep containers.

Compost smart

Without animals to provide manure, you’ll need to be intentional about compost. Kitchen scraps, leaves, grass clippings, and even shredded paper can build healthy soil over time. A small tumbler composter or DIY pallet bin works great in town.

Preserve what you grow (and buy)

Canning, dehydrating, and fermenting let you stretch your harvest or farmer’s market finds through the year. Water-bath canning is beginner-friendly, and a basic dehydrator opens up a world of food storage options without a root cellar.

Harvest water

Rainwater catchment systems are often allowed even when animals aren’t. Use barrels under your gutters to collect water for your garden. Check local laws, but most towns allow some form of rainwater storage for non-potable use.

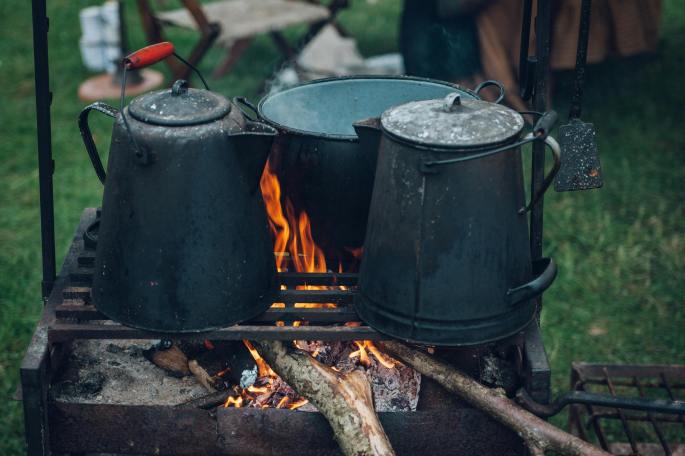
Practice kitchen self-sufficiency

Homesteading isn’t just about what’s outside. Learn to bake bread, make broth, grow sourdough starter, and cook from scratch. These habits build the foundation of a self-reliant home and stretch your food budget.

Barter and build community

If you can’t raise animals yourself, someone nearby probably does. Trade your extra produce, homemade goods, or skills for eggs, meat, or milk. Join local gardening groups or start one if there’s none in your area.

Focus on skills

Learn to sharpen tools, mend clothes, sew by hand, and preserve food. These timeless skills are the backbone of homesteading and they require no animals or acreage at all.

You don’t need a flock to live more deliberately. With a little creativity and a lot of grit, homesteading in town is possible.

Start at Home

Disclaimer: This blog post is for general interest and informational purposes only. It is not professional training. Outdoor skills involve real risk, and it’s important to receive hands-on instruction and follow all local laws and safety guidelines before heading into the wilderness.

The biggest mistake beginners make in bushcraft is waiting until they’re in the woods to start learning. But the truth is, the woods are not the best classroom when you’re brand new. Out there, mistakes have consequences. At home, they’re just part of the process.

In your backyard, a local park, or even a garage setup, you can—and should—get comfortable with key bushcraft skills long before you’re relying on them. Here are a few foundational things worth practicing in your own space, where the stakes are low, and the learning comes fast.

1. Feather Sticks and Try Sticks: Knife Control 101

You’ll hear folks say “your knife is your most important tool.” That’s true—but only if you know how to use it safely and effectively.

Feather sticks are curls of wood shaved on the end of a stick to help start fires. Making them teaches you fine control and consistency. Try sticks are practice sticks where you carve notches, points, hooks, and other shapes you’ll use in the field.

These teach muscle memory and knife safety. Practice on dry sticks from the yard. Go slow. Focus on technique, not speed.

Tip: Sit on a stump or kneel with a cutting stump in front of you to keep your legs out of the danger zone. Also wear cut resistant gloves for safety.

2. Starting Fires with a Ferro Rod

If you’ve never used a ferrocerium rod before, don’t wait until it’s cold, dark, and windy to try. These rods are reliable but they take practice.

Start at home:

Gather fine tinder (cotton balls with petroleum jelly, dry grass, birch bark, etc.) Hold your rod firm and strike with a solid spine of your knife or a scraper. Aim sparks into the tinder until you get ignition.

Practice until you can do it in just a few strikes. Then try it with natural materials you’ve gathered locally. Once you can light a fire without matches at home, you’ll feel a lot more confident doing it out in the wild.

3. Tarp and Hammock Setup

You don’t need to wait for a camping trip to figure out your gear. Pitch your tarp or hammock in the backyard a few times. Try different knots. Learn what angles keep the rain off, and how tight is too tight.

Practice an A-frame tarp shelter, your hammock hang, or setting up a tent.

The more familiar you are with your setup, the faster you’ll get it up and the safer and more comfortable you’ll be when it counts.

4. Knots and Cordage Work

Every bushcraft shelter, snare, or tool relies on knots. You don’t need a library of them, just a few good ones.

Start with:

Bowline (for secure loops) Taut-line hitch (for adjustable tension) Trucker’s hitch (for tightening lines) Clove hitch (for quick ties)

Cut a few lengths of paracord and practice during downtime. Learn how to tie them with gloves on. Know how to untie them when they’re wet and tight. These little skills add up to real capability.

5. Packing and Layering

This one doesn’t get enough love: knowing how to pack your gear so it’s balanced and accessible and how to dress for changing weather. Try taking a short walk or working outside in your daypack. See what rubs, what shifts, and what you forget.

Why Practice at Home First?

Because the woods are no place for guesswork. When you’re tired, cold, or wet, you want muscle memory, not trial and error.

It’s not “less real” to start in your backyard; it’s smart. Every skill you sharpen at home is one less thing to worry about in the field.

The journey starts where you are. Carving feather sticks on the porch or rigging a tarp between fence posts… you’re building the foundation for a life spent in rhythm with the land.

Start small. Learn well. Be ready for anything.

What to Keep in Your Kit

Disclaimer: This blog post is for general interest and informational purposes only. It is not professional advice or training. Outdoor skills involve real risk, and it’s important to receive hands-on instruction and follow all local laws and safety guidelines before heading into the wilderness.

Bushcraft isn’t about having all the gear in the world. It’s about knowing how to use the right things in the right way. A good daypack isn’t a bug-out bag or a military loadout—it’s lean, purposeful, and lets you move freely through the woods.

If you’re heading out for a few hours to practice your skills or just wander the timber, here’s a solid list of what to keep in your bushcraft daypack.


1. Cutting Tool

No piece of gear gets more use. A fixed-blade knife is ideal—look for something full tang, sturdy, and easy to sharpen. A small folding saw is also a good idea if you’ll be harvesting wood. Leave the giant machete at home unless you’re clearing brush.

Recommended: Mora knife, Bahco Laplander folding saw


2. Fire Kit

Always carry more than one way to start a fire. Even if you don’t plan on building one, having the option can save your bacon.

Pack at least:

  • Ferro rod and striker
  • Bic lighter or stormproof matches
  • Homemade fire starters (cotton + petroleum jelly or wax cups)

Keep everything in a waterproof container or tin.


3. Water and Purification

You don’t need to carry a gallon, but you do need a plan. A metal bottle lets you boil water. Add a backup like iodine tablets or a small filter if you expect to stay out longer or forage for water.

Tip: Nest your bottle in a stainless steel cup for boiling and cooking.


4. Shelter Basics

Even on a short trip, weather can turn fast. A basic tarp or emergency blanket weighs next to nothing and could be a lifesaver.

Include:

  • Tarp or space blanket
  • Paracord or bank line
  • A few stakes or sticks

With a little know-how, this is enough to build a quick lean-to or windbreak.


5. Cordage

Never underestimate how handy cordage can be—setting traps, building shelter, hanging food, repairing gear. You don’t need 200 feet, but a few lengths of 550 paracord or #36 bank line go a long way.


6. Navigation Aids

If you don’t have a good sense of direction, get one. Until then:

Carry:

  • Map of the area
  • Compass
  • Grease pencil or small notebook

Phones are great, but bushcraft assumes you may not have service or power. Know how to use that compass before you leave home.


7. First Aid Kit

Keep it basic, but don’t skip it. Cuts, scrapes, and burns happen often when you’re working with fire and steel.

Suggested contents:

  • Bandages and gauze
  • Antiseptic wipes or salve
  • Tweezers
  • Ibuprofen or aspirin
  • Tape

8. Food

Just a snack or two is fine—jerky, nuts, dried fruit, hard cheese. Enough to keep your energy up if you stay longer than planned.

If you want to cook, add:

  • Small pot or nesting cup
  • Collapsible tripod or hanger (like you already use)
  • Spoon or spork

9. Lighting

Don’t count on making it back before dark. A small flashlight or headlamp with extra batteries is worth its weight every time.


10. Gloves & Bandana

Work gloves keep your hands from getting shredded when gathering wood or carving. A bandana does a dozen things: water pre-filter, sling, sunshade, dust mask, even a makeshift pouch.


Keep It Light, Keep It Smart

Your daypack should stay under 10–15 lbs loaded. It’s not a mobile gear closet. The best loadout is the one that doesn’t get in your way—and that you actually practice with. Run drills. Set up a tarp. Build a fire with your kit. Get used to making do with less.

Bushcraft is half skill, half preparation. What you carry is only as useful as what you know how to do with it.

Building a Camp Fire That Lasts

Disclaimer: This blog post is for general information and community sharing. Fire can be dangerous if not handled responsibly. Always follow local fire laws and burn bans, and consult a trained professional or local authority if you’re unsure.

A campfire seems like the kind of thing anyone should be able to build. Toss some wood in a pile, light a match, and enjoy, right? But if you’ve ever watched your fire fizzle out after five minutes—or smoked yourself out before it even caught—you know there’s a little more to it.

In this post, we’re going to walk through how to build a fire that actually works. One that burns clean, stays lit, and keeps you warm all night if you need it.


1. Start with a Solid Base

Don’t build your fire on damp ground or right on top of grass. If possible, dig down a few inches to mineral soil or lay down a base of dry bark or rocks. This keeps moisture from creeping up into your fire and snuffing it out before it starts.

If you’re in a wet area, building a platform out of sticks or a couple flat stones helps a lot too.


2. Understand the Three Layers

Every good fire has three parts: tinder, kindling, and fuel wood.

  • Tinder: Super dry and very small. Think dry grass, cattail fluff, bark shavings (cedar or cottonwood work well in Kansas), or even dryer lint in a pinch. You want enough to catch a spark or flame and hold it for a few seconds.
  • Kindling: Pencil-thin sticks, no thicker than your pinky. These catch from the tinder and raise the heat enough to light the bigger stuff.
  • Fuel wood: Your logs and thicker branches. These should be dry, seasoned if possible, and broken down to manageable size.

The biggest mistake most folks make is skipping straight to fuel wood. That’s how you get a smoky mess that never catches.


3. Build a Structure That Breathes

There’s no one “right” way to structure a fire, but there are a few go-to methods that tend to work:

  • Teepee: Arrange kindling in a cone with tinder in the center. As the flames rise, they catch the upper layers. Good for quick cooking or warmth.
  • Log cabin: Stack kindling and small logs in a crisscross pattern, forming a square around the tinder. It burns a little slower and creates a nice coal bed.
  • Lean-to: Great in wind or wet. Prop sticks against a larger piece of fuel wood that’s angled over the tinder like a roof.

Whichever structure you choose, remember: fire needs air. Leave room for airflow so the flames can climb and grow.


4. Light It Like You Mean It

Use a lighter, matches, or a ferro rod if you’re going old-school. Don’t waste your flame—aim it right into the heart of the tinder, and shelter it with your hands if the wind’s up. Blow gently as needed, but don’t smother it. It should start small, flickering and crackling, then grow steadily.

Keep your kindling close by so you can feed it as soon as it catches.


5. Feed It Right, Don’t Smother It

Once the kindling’s going, add larger pieces of fuel wood bit by bit. Don’t throw on a huge log right away—it’ll rob the fire of oxygen and smother the flame.

Think of it like tending a baby animal. You’ve got to nurture it, build it up gradually, and give it what it needs to grow strong.


6. Stick Around and Tend It

No fire keeps itself going forever. You don’t have to hover, but check it now and then. Shift the wood so it burns evenly, feed it before it gets too low, and keep safety in mind. A small shovel or a bucket of water close by is just good practice.

And when you’re ready to put it out, drown it completely. Stir the ashes, feel for heat, and make sure it’s cool to the touch before you leave.


There’s something ancient and honest about building a fire from scratch. It’s not just survival—it’s comfort, community, and a little bit of wild magic. Practice it in safe conditions, and you’ll carry that confidence with you into the woods.

Purifying Water in the Woods

Disclaimer: This blog post is for general informational purposes only. It’s not a substitute for hands-on training or expert advice. Always consult a trained survival professional before relying on any wilderness water purification methods.


There’s something grounding about being out in the woods with nothing but the basics. But no matter how off-grid you want to go, staying hydrated isn’t optional—it’s essential. The challenge? Most of the water you’ll find in the wild isn’t safe to drink as-is.

Even the clearest stream could carry harmful bacteria, parasites, or runoff from upstream. That’s why purifying your water isn’t just a good idea—it’s a survival priority. Here’s a practical breakdown of how to do it safely and effectively when you’re out in the wild.


1. Start With the Cleanest Source You Can Find

Before you do anything, look for the cleanest water possible. Flowing water is better than stagnant. Springs, fast-moving creeks, or water dripping from rocks are ideal. Avoid water with visible algae, foam, or discoloration. The less debris and contaminants to deal with, the easier it’ll be to purify.

If you have a cloth or bandana, use it to filter out dirt and debris before any purification. Even coffee filters or a shirt sleeve can work in a pinch.


2. Boiling – The Gold Standard

If you’ve got a metal container and a way to make fire, boiling is hands-down the most reliable way to kill pathogens. Bring water to a rolling boil for at least one full minute. If you’re at an elevation over 6,500 feet, boil it for three minutes, since water boils at a lower temperature at higher altitudes.

Boiling kills bacteria, viruses, and parasites like Giardia and Cryptosporidium. Just remember—it doesn’t remove chemical pollutants or heavy metals, so don’t boil from sources near farmland, roads, or industrial sites.


3. Solar Disinfection (SODIS)

This method is surprisingly effective when you’ve got sunshine, time, and clear plastic bottles. Fill a clean, clear PET plastic bottle (like a soda bottle) with filtered water and lay it flat in direct sunlight for at least six hours—longer if it’s cloudy.

The UV rays from the sun kill many of the common pathogens found in wild water. It’s not foolproof, but in a pinch, it’s a decent backup if you don’t have fire or a filter.


4. Charcoal + Sand Filter (Improvised Option)

You can make a basic filter with a container (like a plastic bottle or hollowed stick), layers of crushed charcoal, clean sand, and small gravel. The water flows through the layers, which helps remove sediment and some impurities. This does not purify the water, but it pre-filters it before boiling or disinfecting.

Think of it as stage one. It clears out the big stuff so your main purification method can do its job more effectively.


5. Store-Bought Filters (If You Have One)

If you’re headed into the woods with a bit of gear, a portable water filter (like a Sawyer Mini or LifeStraw) is a solid investment. These remove bacteria and protozoa, and many of them can screw directly onto bottles or pouches. Some models also filter out viruses and chemicals—but always check the specs.

Filters do have a lifespan, so track how much water you’ve run through them and clean or replace as needed.


A Word on Chemical Purifiers

You can purify water with iodine tablets or chlorine drops, but they require precise dosing, and not everyone tolerates the taste (or the chemicals themselves). They’re lightweight and easy to carry, so they make a good backup, but not a long-term solution.


Final Thoughts

When it comes to wild water, don’t take chances. Just because you can’t see anything wrong with it doesn’t mean it’s safe. Boil if you can, filter when you must, and always aim for the cleanest source available. Your health out there depends on it.

Wilderness survival isn’t about macho posturing or pushing your limits for the sake of it. It’s about learning how to live with the land—safely, humbly, and with a deep respect for the risks and rewards that come with it.

If you want to try these methods in real time, consider joining up with others who are learning the same way. Skills get sharper when shared.